Hello, I’m Thitaphon Piraban, also known as ‘Palm’ Piraban. Currently, I work as a CG Generalist at FuseFX in the United States. I originally hail from Thailand and hold a B.Sc. in Animation from the College of Art, Media, and Technology in Chiang Mai, Thailand, and an M.A. in Visual Effects from Savannah College of Art and Design (SCAD) in Georgia, US. During the Summer of 2021, I took on a project to learn Houdini by grooming a red panda. This involved grooming its hair and fur and improving my skills in 3D look development and lighting.
I invite you to check out this article, where I share my process of creating the Red Panda. It was my first creature grooming experience in Houdini, where I applied the techniques learned from online tutorials by Jesus Fernandez, a VFX artist specializing in hair and fur.
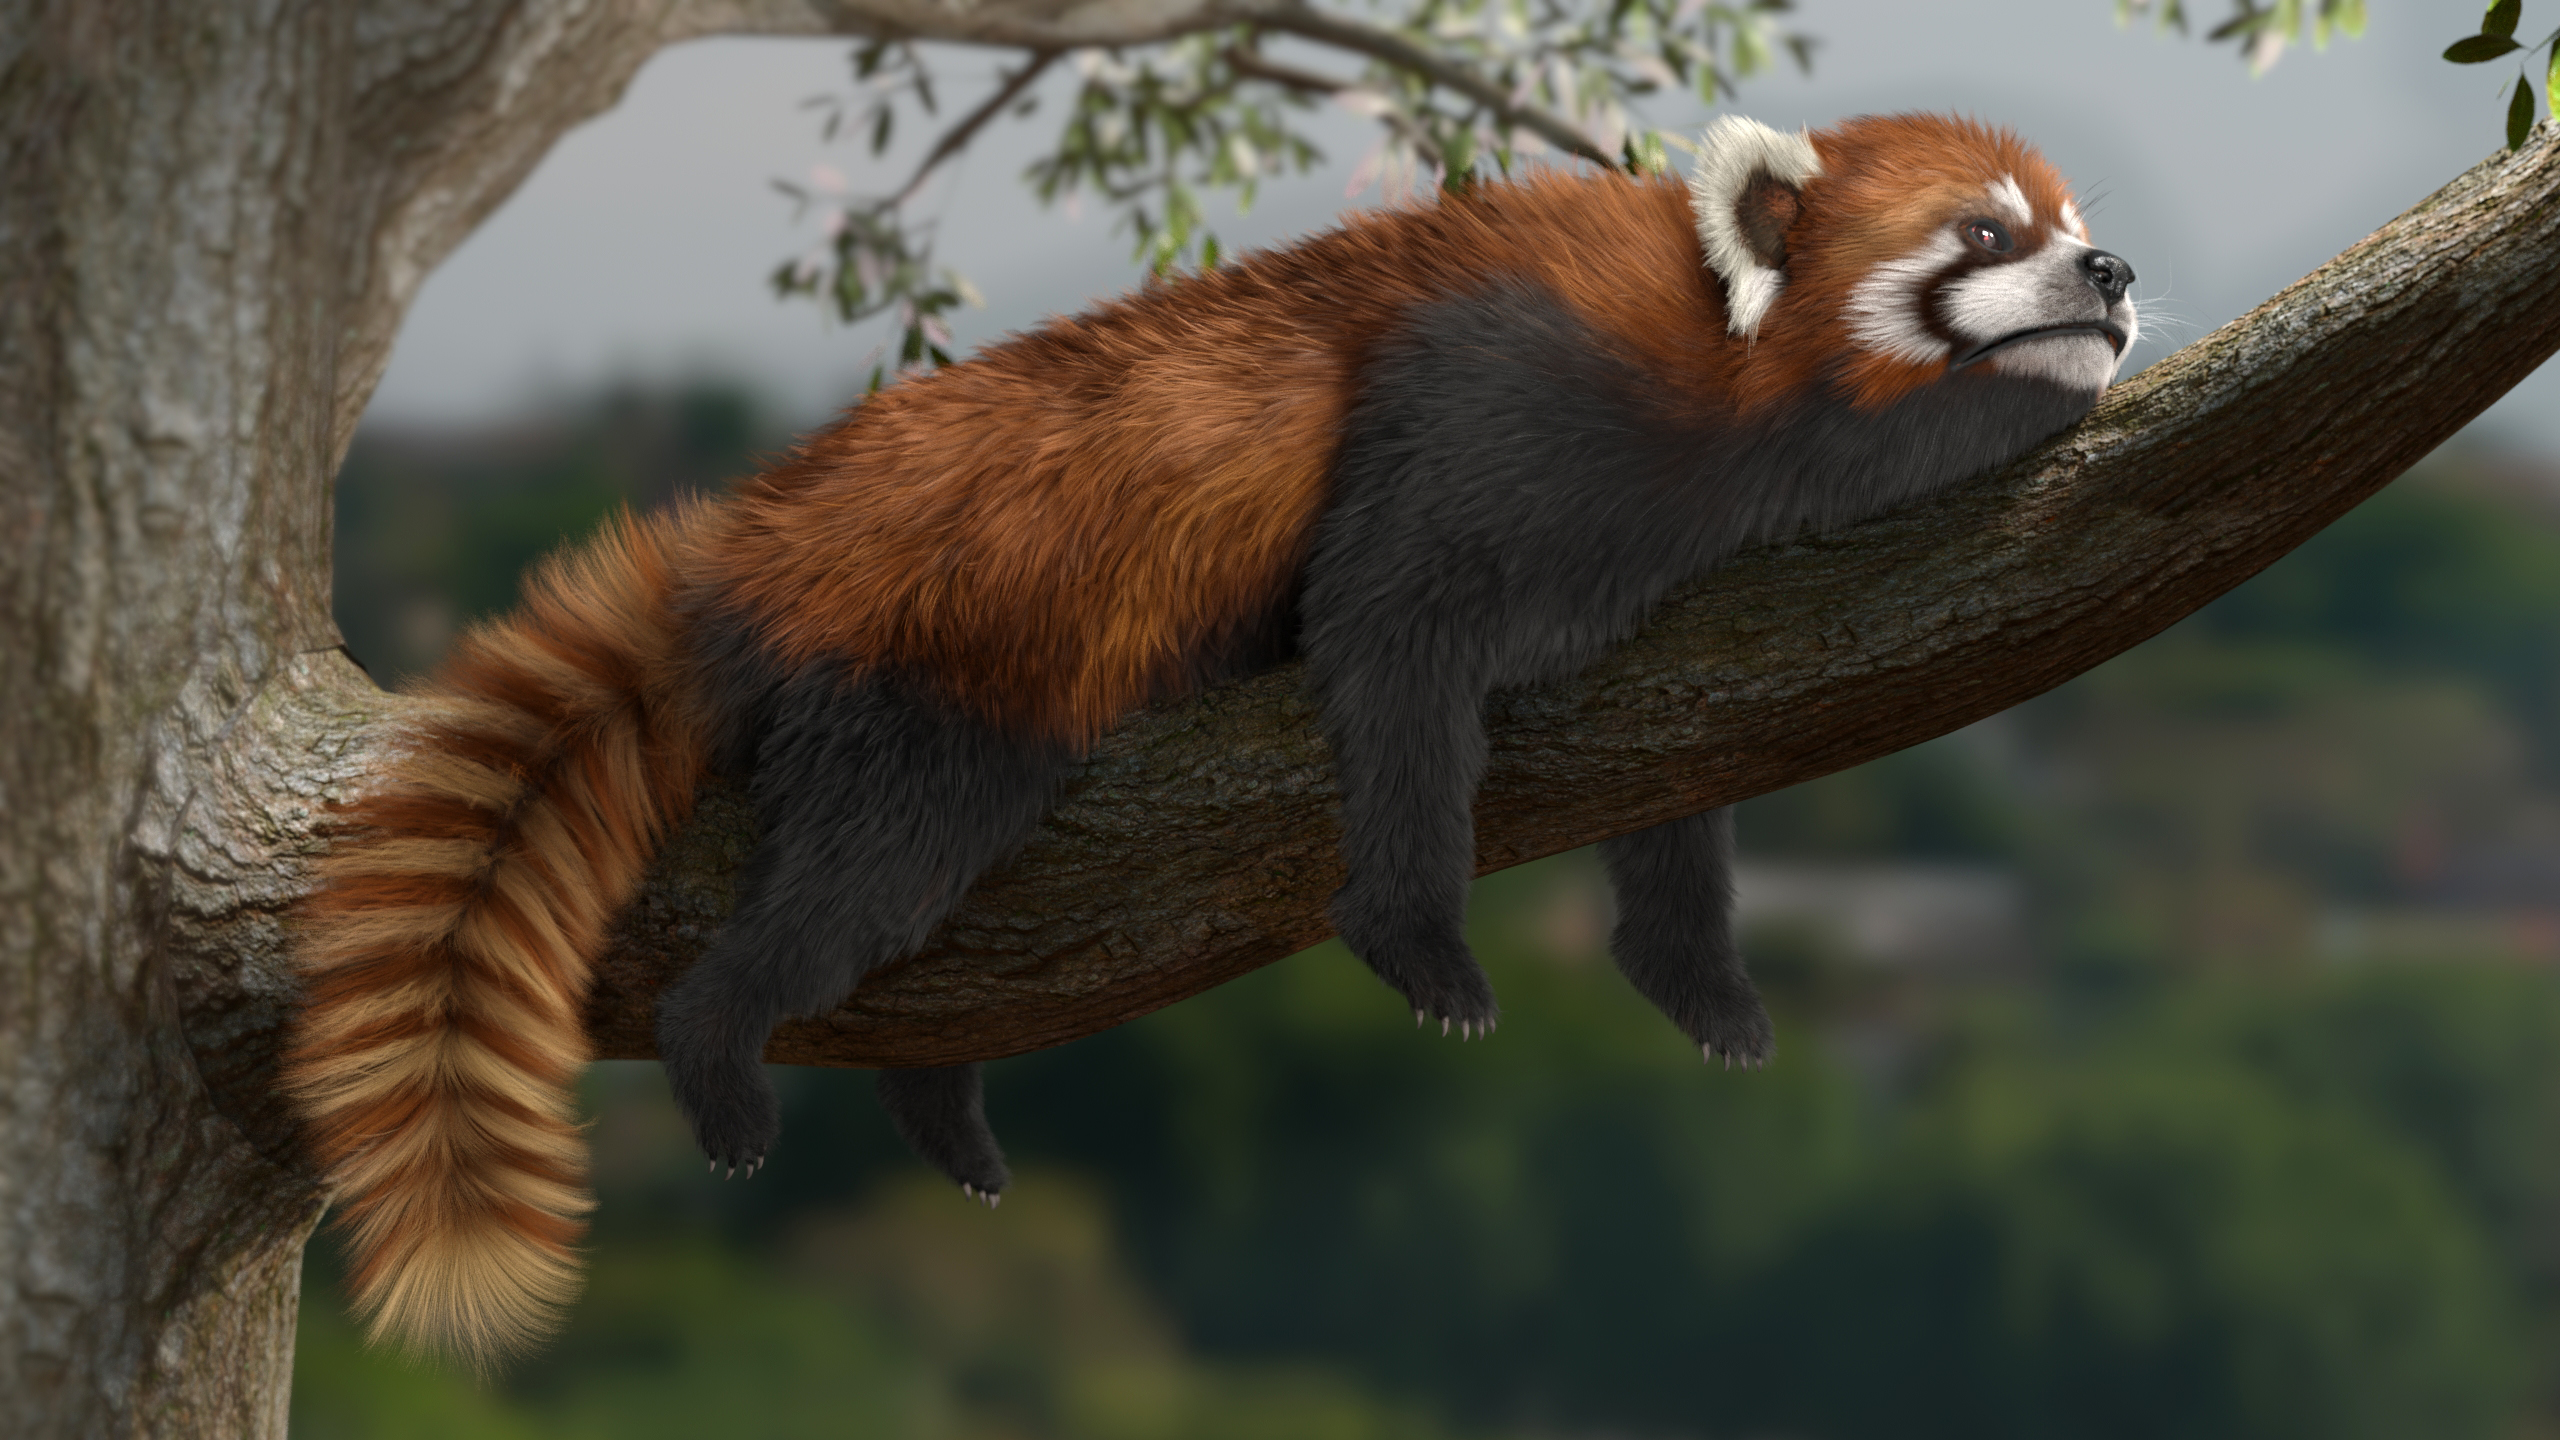
Role: Textures, Grooming, Lookdev, and Lighting Model created by Alejandro Castiblanco in Jesús Fernández Online Course
Final Rendered Image
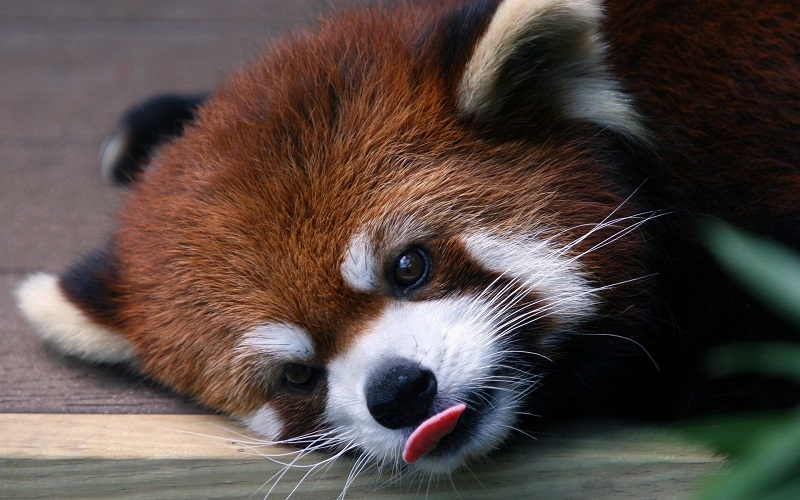
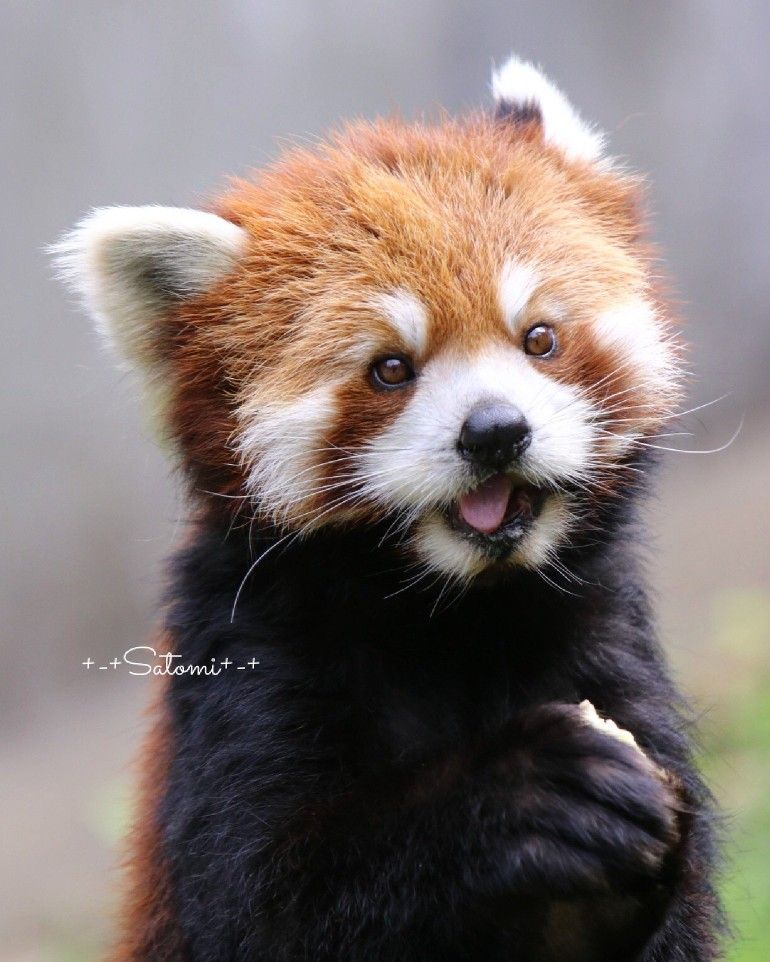
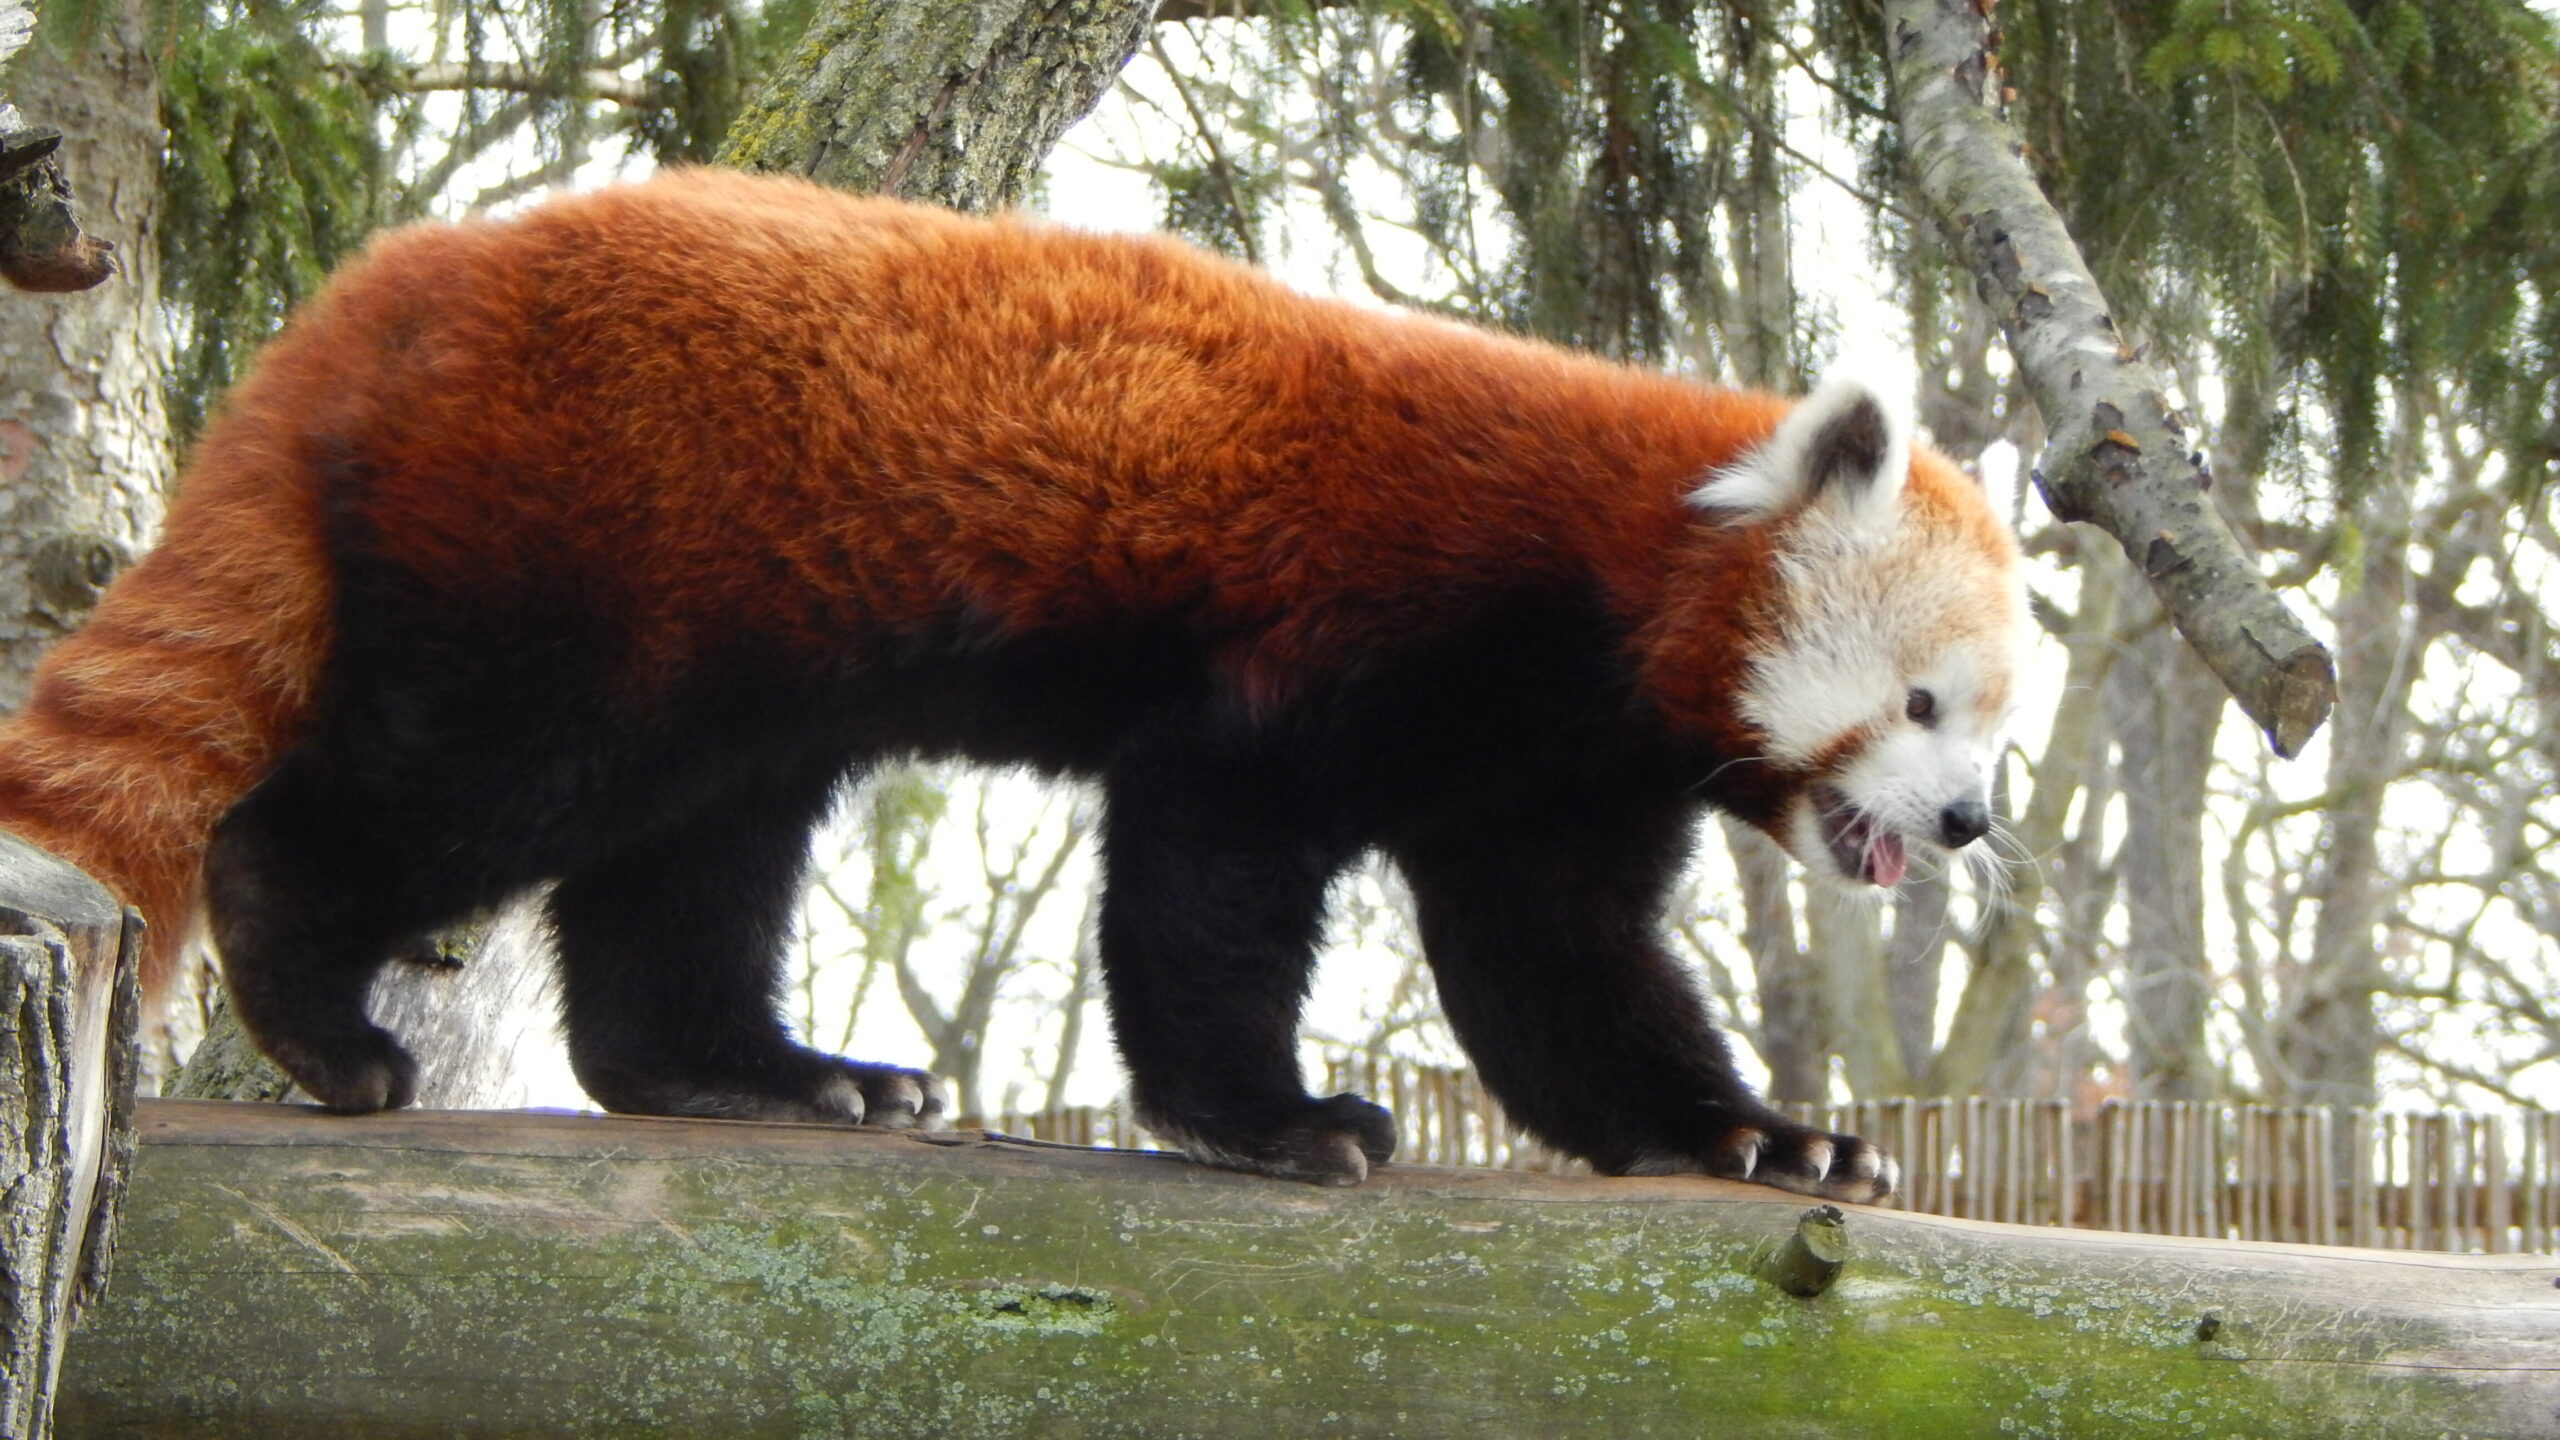
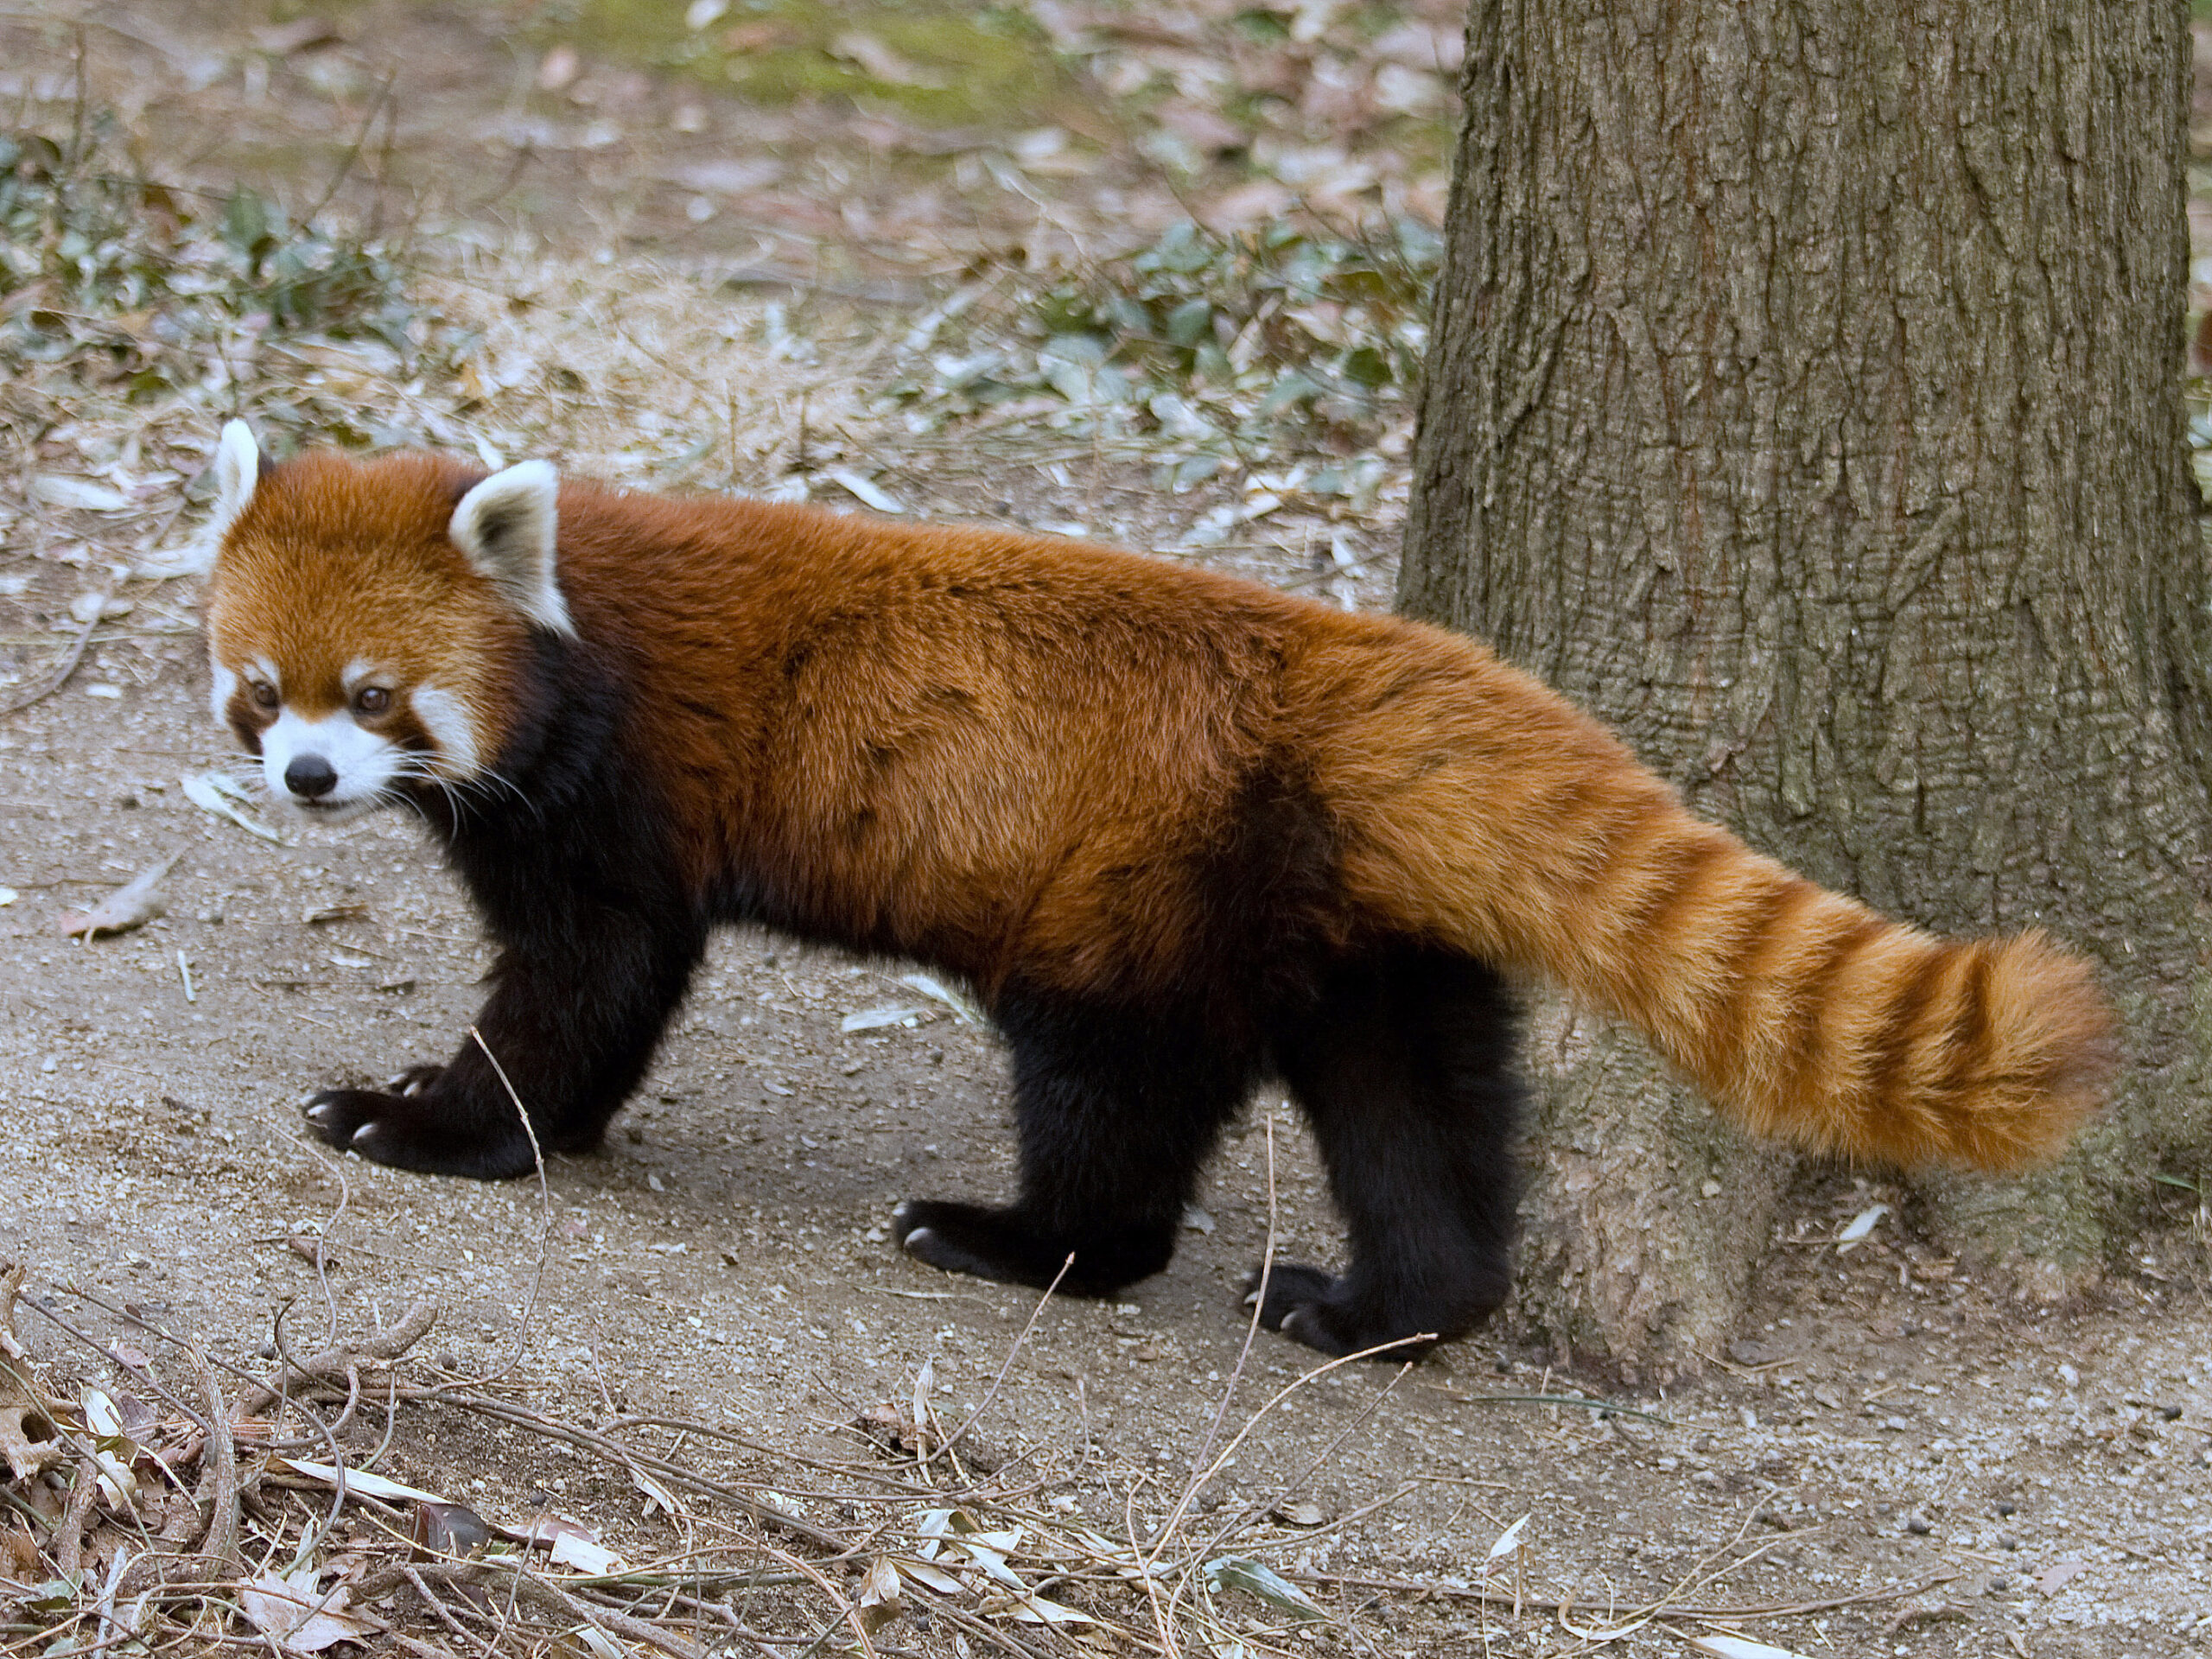
Reference
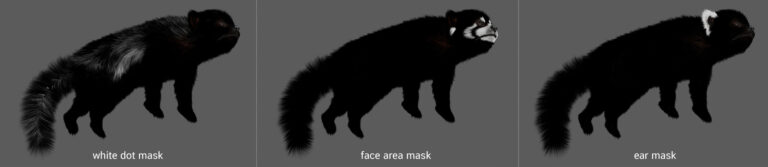
Out of the available images, I decided to use the middle one as my primary reference for the creature grooming project. The reason for this decision was that the middle image showcased a unique fur style that I found particularly interesting and thought could serve as a great inspiration for the project. By using this image as my main reference, I was able to incorporate some of its unique qualities and incorporate them into the final design, resulting in a finished product that was both visually appealing and true to my initial vision.
Preparation
To kick off the project, I started with a 3D model created by Alejandro Castiblanco in Jesús Fernández’s online course and began the grooming process. To make it more manageable, I split the guide grooms but encountered challenges with smoothing out each border
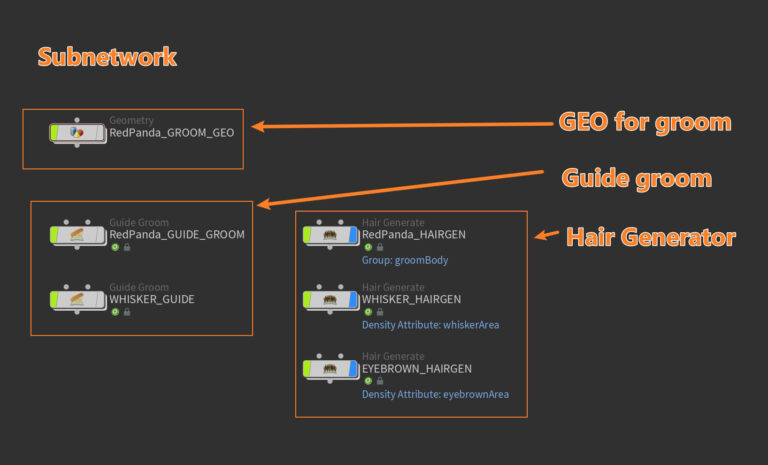
I separate Geometry , Guide Groom, and Hair Generate. I also painted masks within this node, including density, length, and clump. Overall, these organization techniques helped me to better manage the grooming process, and ultimately resulted in a more efficient and effective workflow.
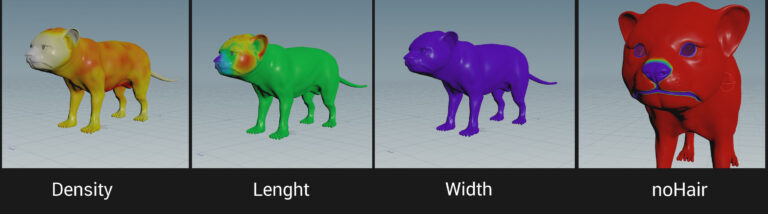
paint attribute
Grooming
GROOMING GUIDE
This grooming guide was created using the Groombear plugin (https://kwac.gumroad.com/l/groombear). To start, I used an Object merge to link to the GEO Node outside the subnetwork and then created a guide groom node.
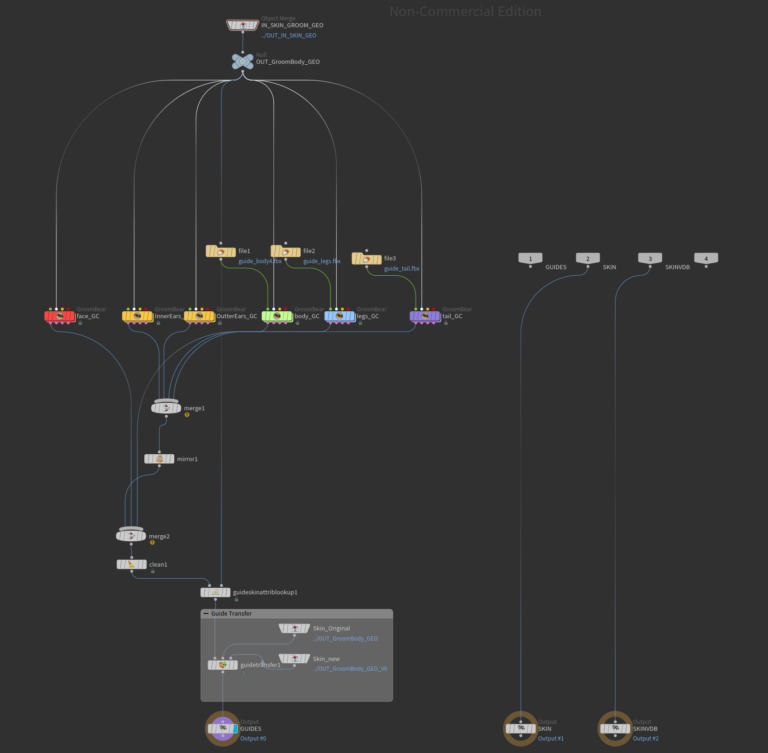
To make the grooming process more manageable, I split the guide groom into separate nodes. However, I encountered challenges in smoothing out each border. The attached image provides an overview of the guide groom connection, which I’ll delve into further in the next image.
After the merge2 node, I used the “guideskinattriblookup” to connect the clean guide and skin, and then transferred the guide groom to a new model using the “GuideTransfer” node.
overall guide groom connection
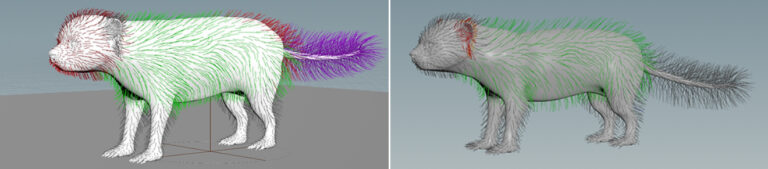
guide groom in original model vs modified model
Before and after transfer guide.
HAIR GENERATING
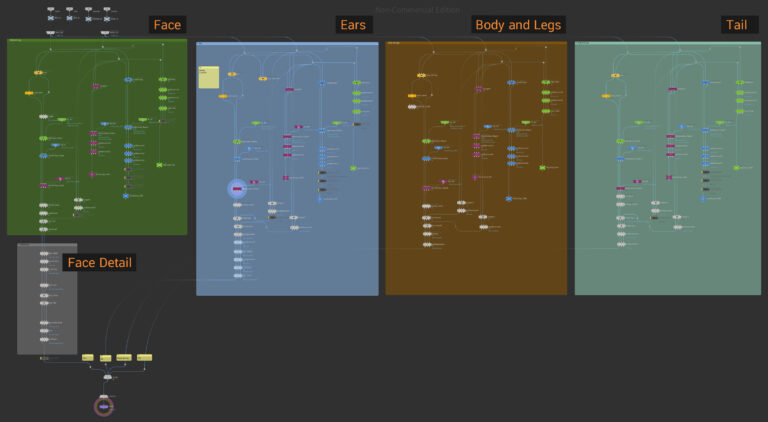
To accommodate the different densities and looks of each part, the Hair Generate group was divided into four parts: face, ears, body+legs, and tail, each with its own hair generator node. To simplify the connections, a null node was created and an object was used.
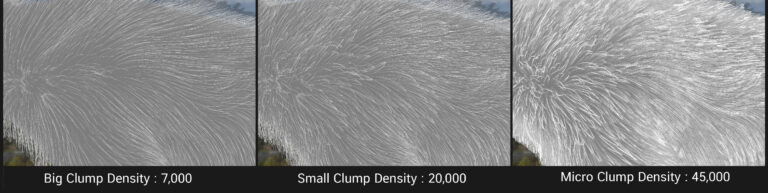
The clumping process was separated into three sizes – big, small, and micro – and added to the main line. To fine-tune the hair, a guide process node was used to bend, frizz, and set the length. To make the small clump inside the big clump, a connection was made from the big clump to the custom curve in the small clump hair clumping node. The same process was repeated for the micro-clumping node. Finally, to refine the hair further, a guide process node was used to adjust the bend, frizz, and length of the hair.
overall hair generate connection
density in each clump
relationship in each hairgen
Rigging
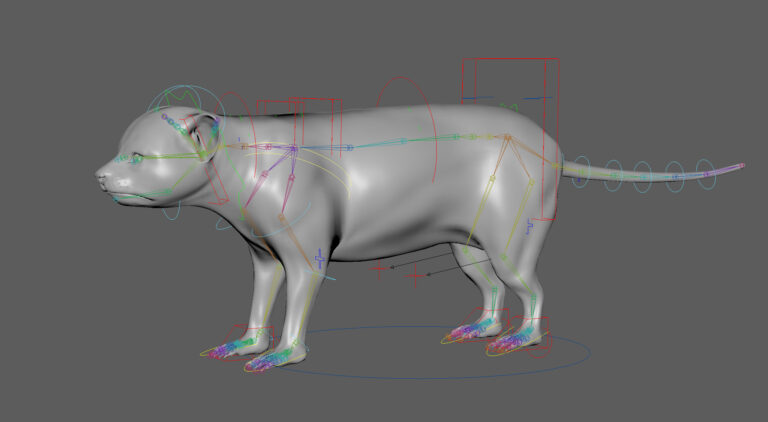
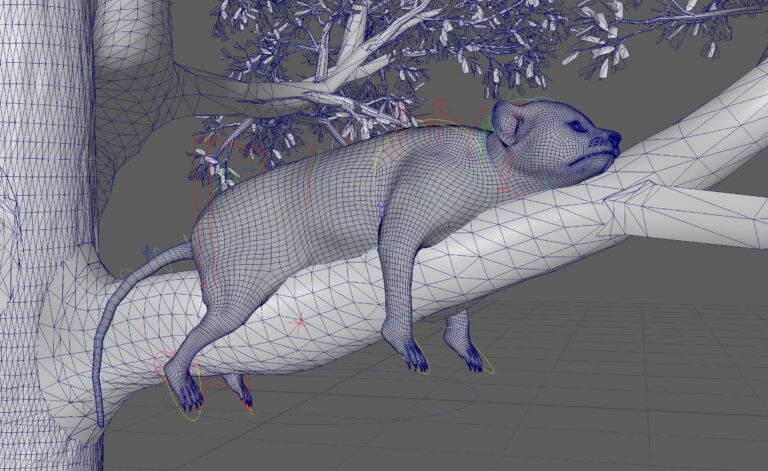
Creating a realistic and engaging character in 3D animation requires a meticulous approach to rigging. For the red panda, I utilized Autodesk Maya’s Advance Skeleton tool to create a simple quadruped rig, allowing for a wide range of movements and actions. The tool’s intuitive interface made it easy to rig the four legs, torso, neck, and head of the red panda.
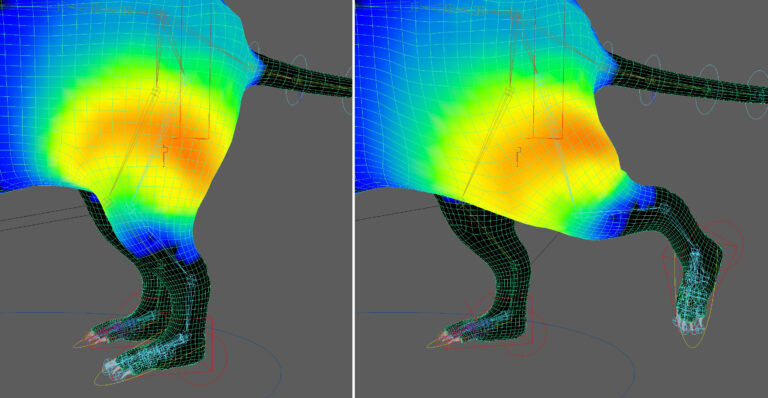
Once the rig was in place, I moved on to the weight painting process. Weight painting involves assigning how much influence each bone of the skeleton has on the surrounding mesh, ensuring smooth and natural movements. Using Maya’s weight painting tools, I carefully assigned a weight to each part of the red panda, ensuring that the movements were accurate and believable.
To ensure anatomical accuracy and the right positioning, I imported a large tree as a reference mesh. This allowed me to hang the red panda in a way that was both realistic and engaging. By using the tree as a reference, I could make sure that the red panda’s weight was distributed evenly across its four legs, and that its body was positioned in a way that closely resembled that of a real-life red panda. By carefully rigging and weight-painting the red panda, and using a reference mesh for positioning, I was able to bring the character to life in a way that was both engaging and true to life.
red panda quadruped rig
I set two keyframes in the timeline (start and end motion) for the paint weights on one side and then mirrored it to the other side.
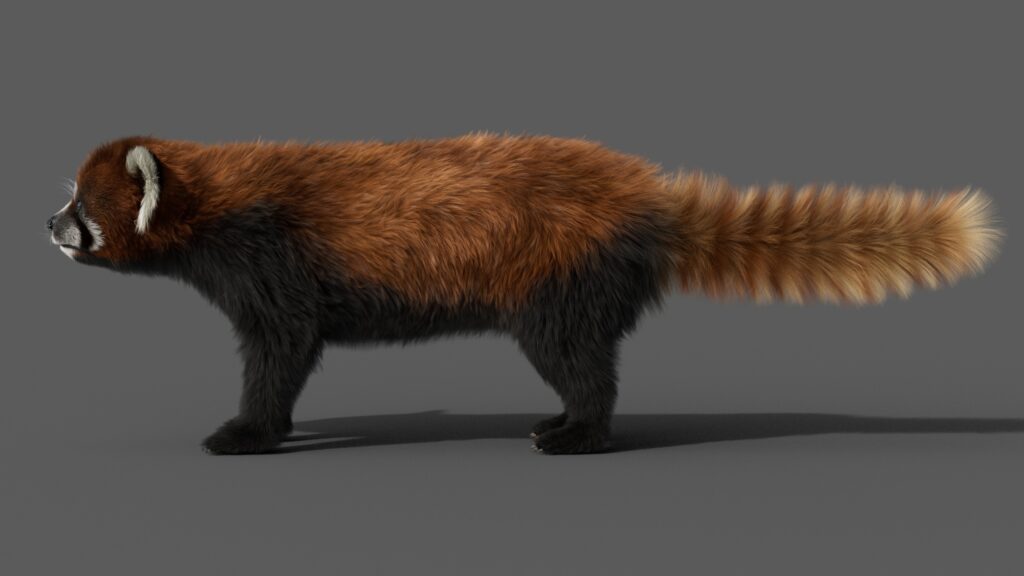
final pose of the red panda
Texturing
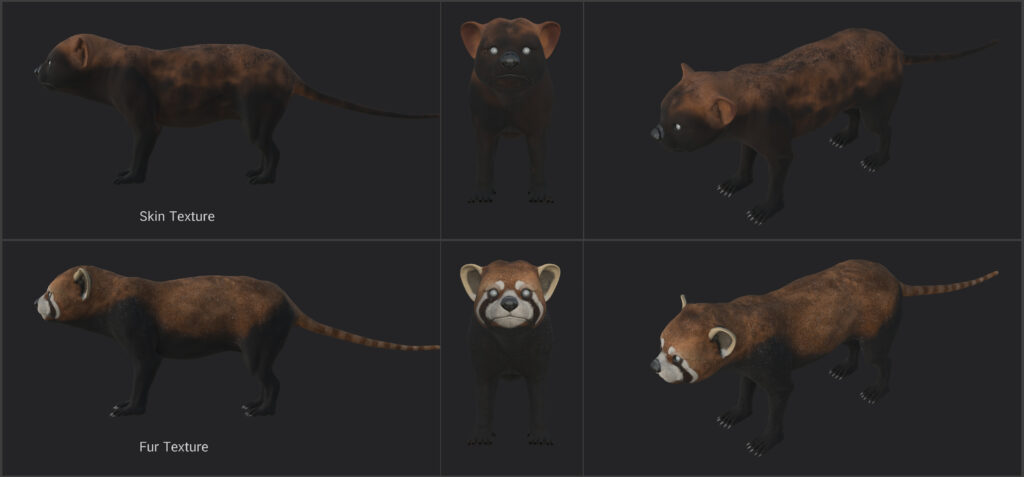
To create realistic skin and fur textures for my 3D model, I used Substance 3D Painter. I painted the skin and fur textures separately, each with a resolution of 4096×4096. Using the old UV map allowed me to paint the textures accurately, as the new geometry had the same UV proportion as the old one.
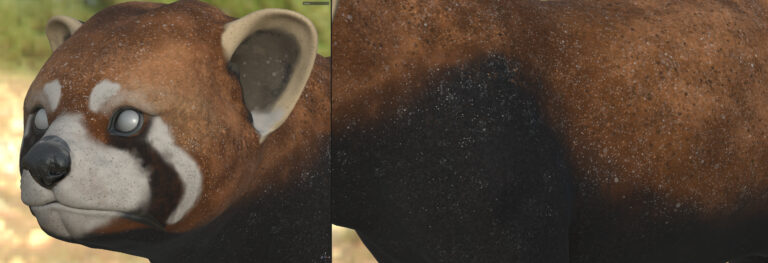
To add more detail and variation to the fur texture, I used the spray brush in Substance 3D Painter. By spraying the whole geometry evenly with a small brush size, I was able to create the imperfect color of hair required by the real fur generator. This technique helped me achieve a more realistic and natural look for the fur. Finally, I exported the textures as a Redshift template, allowing me to use them directly in the Redshift renderer without the need for further conversion. By utilizing Substance 3D Painter’s powerful tools and techniques, I was able to create high-quality skin and fur textures that brought my 3D model to life.
skin and fur textures
The small white dot in texture. The real fur generator requires the imperfect color of the hair.
Lookdev
To start the material and shading process for my 3D model, I set up a look dev light rig in Houdini Scene. This consisted of one neutral or low-contrast HDRI and one key light. I used the “Kloofendal 38d Partly Cloudy” HDRI from Poly Heaven for this purpose.
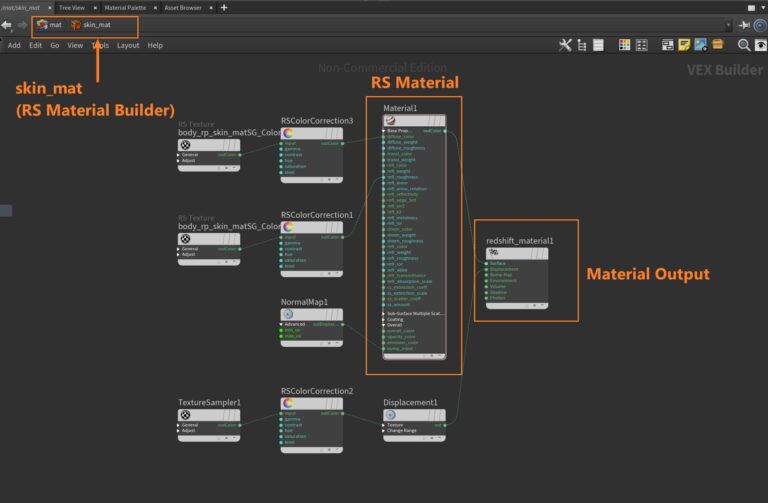
For the skin material, I connected an RS Material node to the base color, roughness, and displacement maps. To adjust the color, I used the RSColorCorrection node, which was faster than going back to Substance Painter to make changes. I then connected the RSColorCorrection node to the RS Material input.
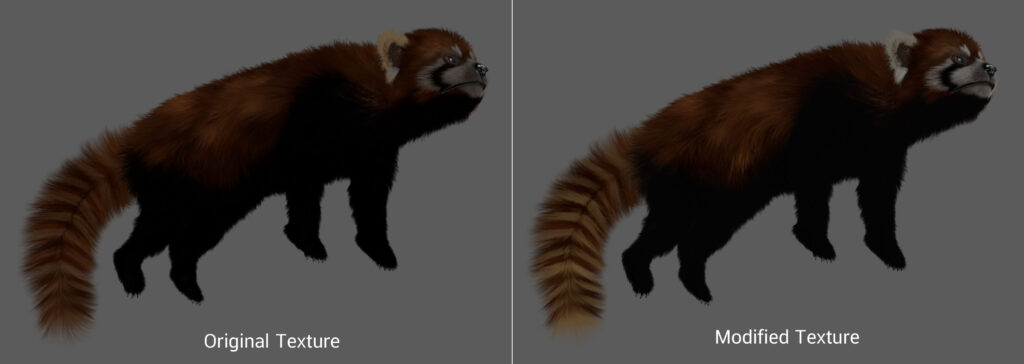
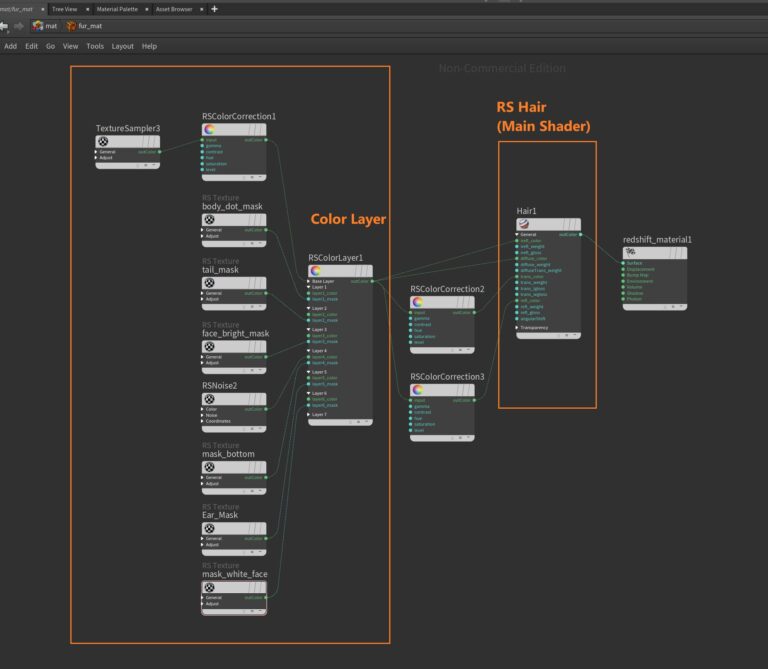
For the fur shader, I used a similar approach but with a different main material. I used the RS Hair material and mixed several layers, including the base color, body mask, tail mask, ear mask, and more, using the “colors layer” node. I then connected the mixed layers to the reflection and diffuse color inputs of the RS Hair material.
By using these techniques, I was able to create high-quality materials and shaders for my 3D model, bringing it to life with realistic skin and fur textures.
Comparison between the original and mixed textures.
Example of mask that I use in color layer node.
fur material connection
skin material connection
Lighting
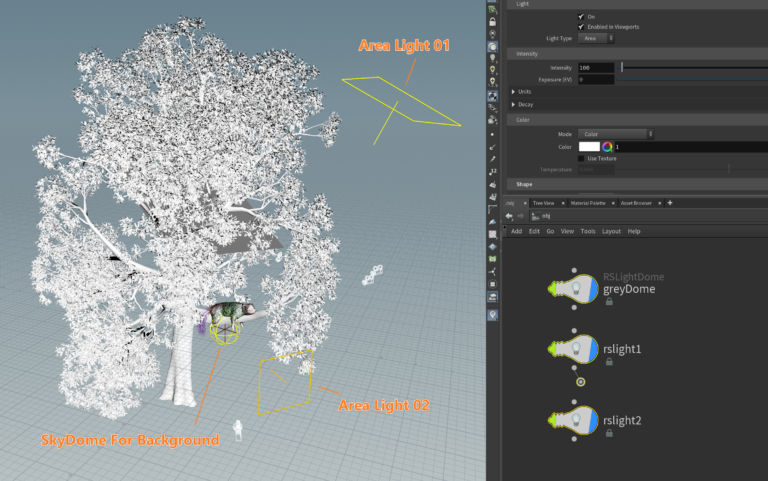
To achieve optimal lighting for my subject, I utilized a simple yet effective lighting setup. Using a sky dome with a low contrast HDRI as ambient light, and 2 area lights, I had complete control over light direction and exposure. By adjusting the brightness of the area lights, I was able to direct the audience’s attention to the subject while maintaining an overall sense of balance.
To achieve the soft, subtle effect I desired, I opted for area lights. While this resulted in longer render times, it was a worthwhile trade-off as directional lights would have produced a higher specularity and smaller falloff. By taking these factors into consideration and carefully adjusting my lighting, I was able to create a captivating and visually pleasing scene.
light position in my scene view
Conclusion
This was a challenging project for me as it was my first time doing creature grooming and using Houdini for just one month. However, I was determined to learn and improve my skills in this area. I spent countless hours researching techniques, experimenting with tools, and seeking guidance from industry professionals.
I began by analyzing reference images of the red panda, studying its unique features, and identifying the fur patterns. I then used various Houdini tools to create a base fur that closely resembled the real animal. I experimented with different parameters such as length, thickness, density, and clumping to achieve the desired look.
Throughout the grooming process, I encountered many challenges and setbacks, but with the help and guidance of my mentors, I was able to overcome them and produce a final result that I was proud of. This project has taught me a lot about the importance of perseverance, collaboration, and seeking feedback. I look forward to applying these lessons to future projects and continuing to improve my skills in grooming and Houdini.