Anna Taylor-Joy
Project Overview
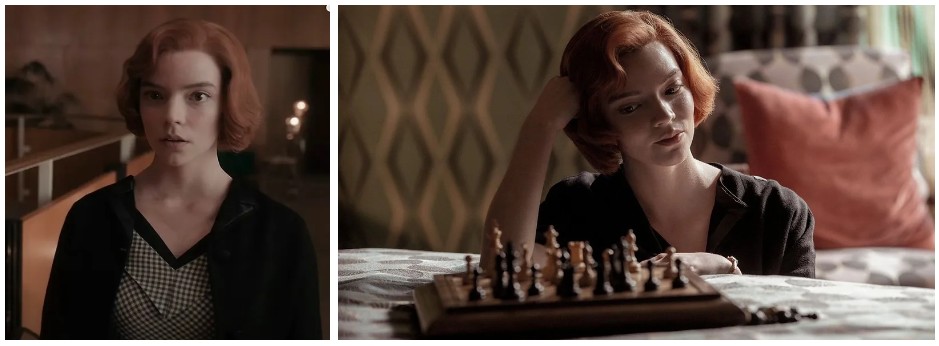
As someone who is passionate about hair grooming and always seeking to improve my abilities, I have embarked on a new project focused on practicing the art of woman’s hair styling. To guide my efforts and help me achieve my goals, I have chosen a stunning shot from the movie “The Queen’s Gambit” as a source of inspiration and reference. By studying this image and analyzing its key elements, such as the model’s hair texture, length, and style, I aim to develop my skills in creating beautiful and customized looks that reflect each client’s unique features and preferences. Through this project, I hope to expand my knowledge and expertise in the field of hair grooming, and ultimately provide my clients with outstanding service and results.
Role: Rigging, Grooming, Lookdev, Lighting
Prop Models: Sofa, cushion, bed, and chess from Turbosquid.
Character Model and Texture: Badin Wongsawat

Reference
I drew inspiration for this project from season 1, episode 3 of the Netflix series The Queen’s Gambit. I was captivated by the excellent visual storytelling, compelling cast, and outstanding set and location design. The attention to detail in the show’s production design, especially in the 1960s fashion and decor, is truly remarkable and provided an excellent reference for my own work.
To recreate the look and feel of the show in my 3D scene, I carefully studied the show’s color palette, lighting, and camera angles. I also researched the history and culture of the 1960s to ensure that my scene accurately captured the era’s fashion and style. This research helped me make informed decisions about the design of the scene, such as the choice of props and furniture.
Overall, the experience of recreating The Queen’s Gambit in 3D was both challenging and rewarding. It allowed me to further develop my skills in 3D modeling, texturing, and lighting while paying homage to a fantastic piece of visual storytelling. I hope that my work captures some of the magic and nostalgia of the show and inspires others to experiment with their own 3D projects based on their favorite films and TV shows.
Preparation
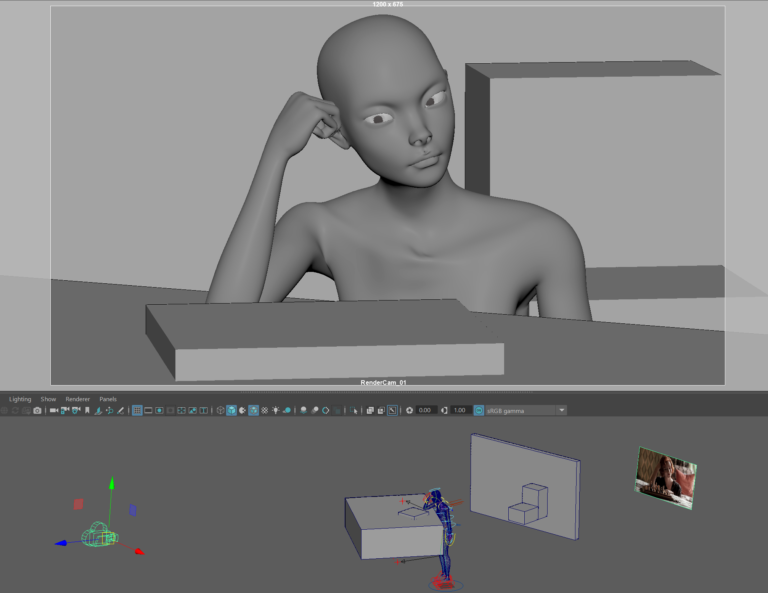
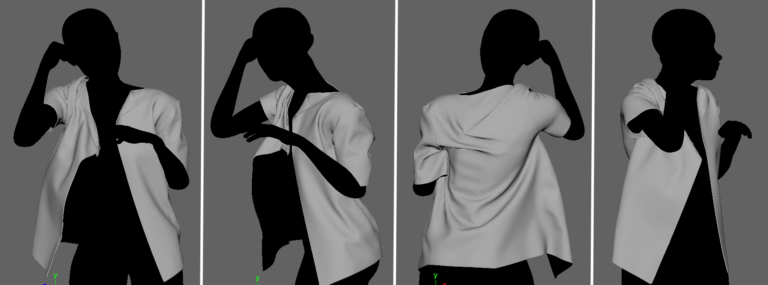
Before starting the grooming process, several preparation steps are necessary to ensure that the final output matches the desired composition and lighting. Firstly, the model and texture provided by Badin Wongsawat needed some additional adjustments such as posing and detailed sculpting. These modifications were necessary to ensure that the model fits the desired composition and lighting direction.
In addition to the model adjustments, I also created a cloth that matched the reference image and added blocking objects to the scene. These objects helped to establish the overall lighting setup and composition. By including these elements early in the process, I was able to visualize the final output and make necessary adjustments before proceeding with the grooming.
Overall, the preparation steps were crucial in ensuring that the final output matched the desired composition and lighting. By taking the time to adjust the model, create additional elements, and establish the lighting setup, I was able to create a successful final render that met the project’s goals.
Grooming
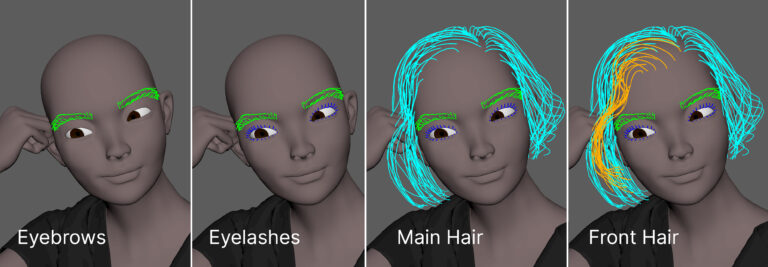
In order to streamline the grooming process, I decided to split the guide grooms for eyebrows, eyelashes, main hair, and front hair. This allowed me to have better control over the shape and form of each element. However, I did face some challenges when it came to achieving smooth transitions between the split grooms.
Despite my best efforts, I found it difficult to get the split grooms to blend seamlessly at the borders. This led to some inconsistencies in the final result, which was not ideal. In the future, I plan to experiment with different techniques to achieve smoother transitions, such as using more sophisticated grooming tools or adjusting the parameters of the grooming modifiers.
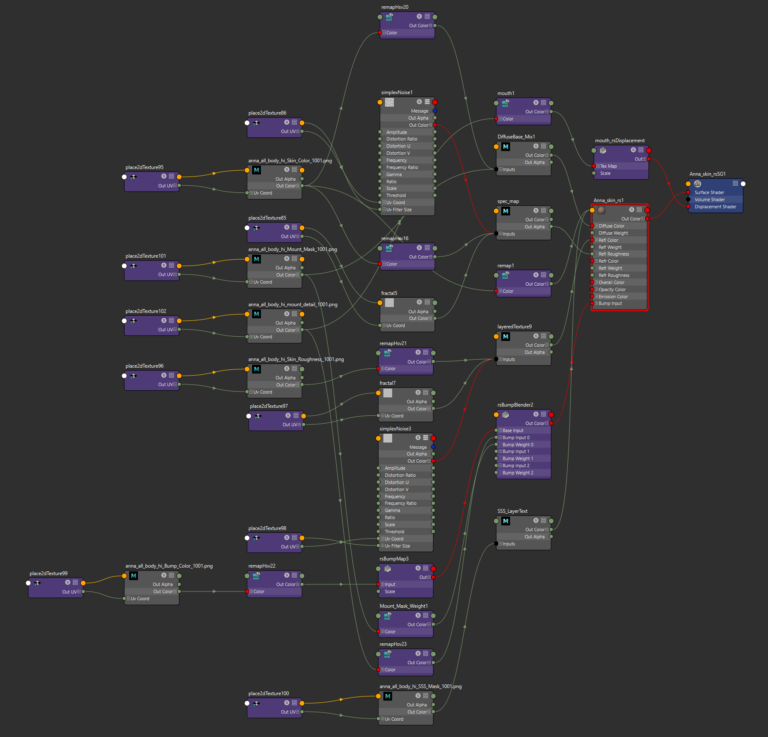
Shading
Redshift is a powerful renderer that provides advanced features for creating realistic and visually stunning 3D renders. RedshiftMaterial and RedshiftHair are the primary shaders used in this project, with basic materials used for skin, shirts, and props, and RedshiftHair used for eyebrows, eyelashes, and hair. These shaders simulate the behavior of light, reflections, and shadows, offering precise control over the appearance of the final output. RedshiftHair is particularly useful for creating lifelike hairstyles and grooming, thanks to its realistic motion and dynamics.
The combination of Redshift’s rendering capabilities and the advanced features of RedshiftMaterial and RedshiftHair offers a comprehensive solution for high-quality 3D rendering. This allows for greater control over the final output, resulting in more realistic and visually appealing renders.
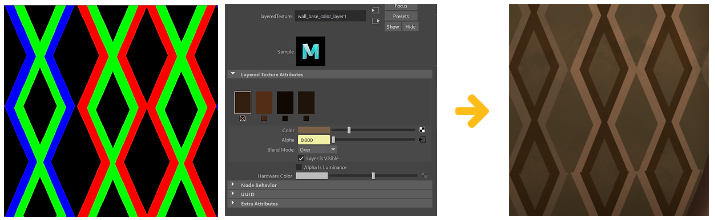
Creating patterns for the wall, sofa, and blanket in the 3D scene required the use of a mask created in Nuke, which was then exported as RGB and black and white channels. These channels were then linked to a LayerTexture node, allowing for easy changes to the color of the pattern. This approach provided precise control over the appearance of the patterns and resulted in a more realistic and visually appealing final render. The shading connection for this process is shown in the accompanying images, highlighting the step-by-step process of linking the channels to the LayerTexture node.
Lighting
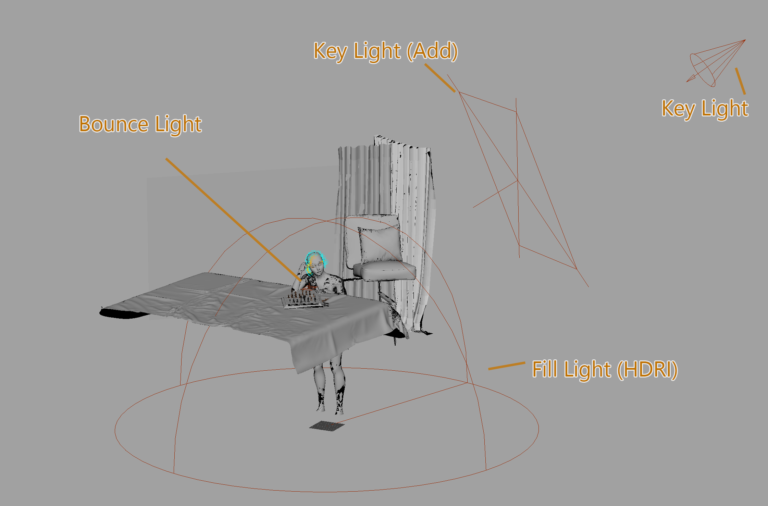
In the lighting process of my project, I utilized the indoor low-contrast Studio Country Hall HDRI from Polyheaven.com as my starting point. The reason for choosing a low-contrast HDRI was to have greater control over the key lighting, which I added separately.
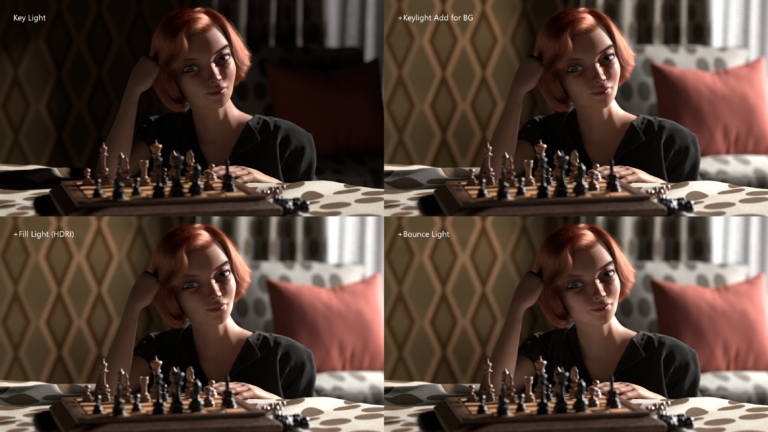
To illustrate the lighting process, I have attached a series of images showcasing the different lighting components in the scene during rendering. These images highlight the key light, key light for BG, fill light, and bounce light, and demonstrate how I was able to achieve the desired lighting effects in my final render.
Conclusion
In this project, I learned how to use XGEN and Maya to create realistic woman’s hair. After receiving the rigged model and texture, I created a blocking scene that included tasks such as measuring scale, editing posture, creating a background, and finding props. While XGEN was a new tool for me to groom a woman’s hair, I found that it was particularly challenging due to the complex shape of the hair. To achieve the desired result, I utilized a variety of modifiers such as clump, noise, cut, and coil after finishing the guide.
I would like to express my appreciation to Badin Wongsawat for providing a great rigged model and texture, as well as for offering useful advice during my work with XGEN. I hope you enjoy viewing my completed work and breakdown process.